Generate Codes – Export and Print
This chapter explains how to export and print codes created with Barcode Studio.
You can share generated codes with other applications in the following ways:
| Method | Description |
|---|---|
| Export single code | Save as an image file (raster or vector) |
| Copy to clipboard | Paste as an image or Windows metafile into applications that accept these formats |
| Print single code | Print with type, size, and quality info |
| Batch export | Export a series of codes from the Data List |
| Print labels | Print codes on label sheets (see Labels) |
| Command-line | Automate code generation – see Appendix D |
Before exporting, adjust the data, code size, and any other necessary settings. Review the notes on Resolution and Readability and Page Data/Size before exporting.
Resolution and Readability
Do not resize exported raster images in image editing software (Photoshop, GIMP, etc.). Scaling distorts module widths and can make codes unreadable. Whenever possible, generate codes at the exact size and resolution required by the output device – this avoids the need for resizing later.
- Monitor the quality percentage in Code Status.
- The resolution set in Barcode Studio must match the resolution of the output device or target application.
Code Quality
When exporting to a raster format (BMP, GIF, JPG, PNG, TIF), reducing to a lower pixel resolution can introduce rounding errors that result in varying module widths. The quality indicator shows how accurately the barcode modules align with the pixel grid at the selected size and resolution:
| Tolerance | Quality | Expected readability |
|---|---|---|
| Perfect | 100% | Optimal output quality |
| Acceptable | 70--99% | Should be readable by most scanners |
| Critical | 50--69% | May be readable |
| Unreadable | 1--49% | Unreadable in most cases |
| Data Loss | 0% | Total data loss, unreadable |
Higher values generally provide better conditions for reliable scanning. For the best result, adjust the module width or enable Optimize Code Quality until the indicator shows Perfect (100%) (see Optimize Code Quality).
Module Width Guidelines
The module width is the width of the narrowest bar or space – the fundamental unit on which all barcode dimensions are based.
- For most linear barcodes, the module width should be at least 0.19 mm.
- The module width should be an integer multiple of a pixel. Use Optimize Code Quality or set the unit to Pixel with a whole-number value.
Export to an Image File
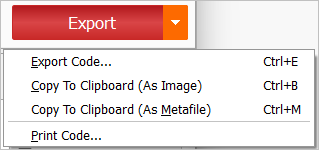
- Navigate to the Codes page.
- Click Export or select Export Code... from the dropdown.
- Choose a destination filename and image format (for example,
PNG (*.png)). - Click Save.
The exported image contains the barcode shown in the preview. Its dimensions and resolution are determined by the settings on the Data/Size page; the preview zoom only changes the on-screen display. See Appendix C: Image Types for the full list of available formats.
Vector Export Settings (EPS, PDF, AI)
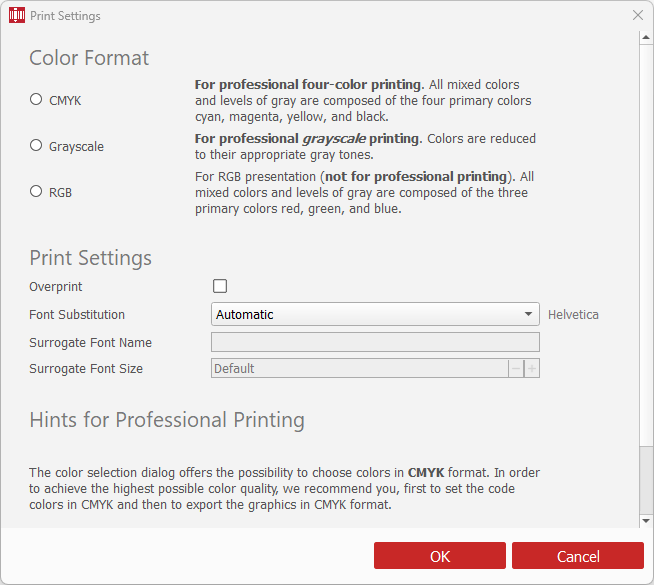
For EPS, PDF, and AI exports, configure these additional options:
Color Format – select CMYK or Grayscale for professional print workflows. RGB is suitable for screen and web use.
Overprint (EPS and PDF only) – controls how overlapping colors are handled on press.
Font Substitution (EPS and AI only) – advanced option; change only if required:
| Mode | Behavior |
|---|---|
| None | Font is not replaced unless it is invalid |
| Automatic (Default) | Replaced with an appropriate alternative when necessary |
| Fixed Font | Replaced with the font specified in Surrogate Font Name; Surrogate Font Size also overrides the original font size |
Copy to Clipboard
As Image – choose Copy to Clipboard (As Image) from the Export dropdown. Paste the image into an application that accepts images, such as Microsoft Word or Excel.
Resizing a pasted raster image can degrade quality and make codes unreadable.
As Metafile (Windows only) – choose Copy to Clipboard (As Metafile). This pastes the code as a scalable EMF vector. Because it is vector-based, you can resize the imported image in your target application without losing readability.
The displayed size of a pasted metafile may differ from the Barcode Studio preview, depending on the target application's resolution settings.
Print a Code
Select Print Code... from the Export dropdown. In the Print dialog, choose the printer and adjust settings, then click Print. The printed page will include the code along with information such as code type, size, resolution, and quality.
Export a Series of Codes from the Data List
- Navigate to the Data List page.
- Add data to the data list (see Data List).
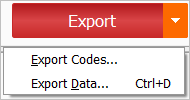
- Click Export and select Export Codes... from the dropdown.
- Configure settings in the Export Codes dialog.
- Click OK to start the export.
To also export the data list as a CSV file, choose Export Data... from the dropdown. See Export Data.
Print Labels
- Navigate to the Data List page and add data.
- Go to the Labels page.
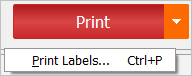
- Click Print or select Print Labels... from the dropdown.
- Choose a printer and adjust settings, then click Print.
Barcode Studio validates the data before printing and outputs labels one page at a time. Each data list item becomes one or more labels on the sheet. See Labels for label layout configuration.
Inkjet printers absorb ink into the paper, widening bars. Enable Bar Width Reduction to compensate for ink spread and improve barcode readability.
Create Codes via Command Line
Barcode Studio allows you to generate single barcodes or batches of barcodes from the command line and export them as image files. See Appendix D: Command Line Parameters.